Translate

Sunday, 13 December 2020

My craft Room


 At long last my craft room is back in use. We have re carpeted our house, so my husband, Robin decided to give my room a spruce up first. So it took me about three weeks to empty everything into the garage, and I had a good sort out while I was at it.I  threw a lot of junk out. I am a crafter so therefore a hoarder but honestly I did have a lot of rubbish. I was just pleased Robin was away for those three weeks so I could do it myself. There are just some things a man should not do So my room is in use again just as well as I have a my grandson Alex staying with me for about four to five days while his mum is still at work.


My Empty craftroom

My stash in the kids bedroom the beds have not been put back up yet didn't know where they would go at that time


Changed my desk it is now facing out to the drive way instead of the street has made the room feel a lot bigger

These shelves were in the corner (where the scan n cut is) on top of each other so had Robin put them on the wall rather pleased with them like that


A couple of bins with all my card and  some of my backing papers  fit  snugly behind me under the window 

Then the cupboard is beside that with my ribbon rack attached to the side.
The cupboard has been turned around as well


All done now, got new curtains as well also got a continuous track made so I can completely close the curtains so now I don't have to sit with the sun in my eyes


Thursday, 10 December 2020

What a mess

This weeks DT call for Creative Knockouts was this cute image from thepapershelter.com called what a mess

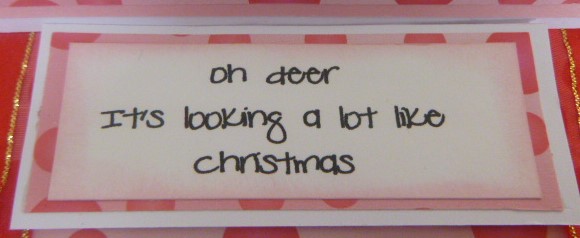
I made mine an easel card. I coloured the image with copics then lightly distress inked the edges, I found two lots of dotty backing paper from my stash. The top part  I adhered the backing paper onto pink card, so you don't see the marker if it bleeds through the card. The box the lights was in I did twice so I could put it onto the card with foam. The bottom piece of the card  I made a bit of a boob and had to take the backing paper off the card, it got a wee bit wrinkly so I ended up putting ribbon on the edges so you couldn't see it The sentiment I did on the computer.


Tuesday, 24 November 2020

Christmas Delight

This week at creativeknockoutsmy DT  image is from Bugaboo it is ava and deacon merry christmas 


The inside of the card had a layer of blue card then a layer of white card I stamped Santa to the top and left it uncoloured I cut the front of the card down so I could sit the image on the top used some Blue gingham backing paper and adhered a strip of blue card to the bottom.I coloured the image with copics adhered it to another piece of thin card,as some of the colour bled through the card, I then cut it out and adhered to front of card.Added the presents
This is the inside
This is fully open and this is why I always put an extra layer on my images as I think it spoils the card if you can see it with patches of copic marker
Am sharing at 


Friday, 9 October 2020

Borders

My DT card for creativeknockouts for October 29th is Border time 

I am ahead of my time, as I have to empty my craft room as it's getting a makeover and and we are putting new carpet throughout the whole house I have been working on it for the past two weeks as I am trying to put the things I use the most into the garage last, that's not working too good 

Any way back to the card

The Image I am using is biker chic from Leanns world, the borders I cut with a punch and adhered then to a white base card,then  a bit of a old map I cut up,then another piece of purple card the image i coloured with copics cut her out on the scan n cut  and another one with plain card then adhered them together I thought that would be enough to 3D her but it wasn't so I ended up putting foam pieces on her, the compass and key (I had to go and get from a box in the garage) the compass is on a part of a flower in white to make it stand out the sentiment I did on the computer reads "where your'e headed is more important than how fast you are going" there is a little rose on the top corner of it

Sunday, 27 September 2020

Another cake on fire

Just fell in love with this set of stamps and this time I have used the little girl from the https://payhip.com empty pockets set, there is another image of the girl with her pockets opened out and there is one of a boy as well.
I embossed both pieces of card with a flourish eb folder the white piece I have finger painted on the top I made a gilding wax by using a mixture of clear shoe polish and eye shadow  works well and when it is dry it doesn't come off I adhered both to a white base card I then printed off the image and the stamps the coloured with copics adhered it to silver card then onto the card I made the flower using a die and the leaves from a punch Inside card it reads
"You don't look a day over whatever age your pretending to be"

This one is my oops one I made the image a bit too big for my normal size card so had to do it on a different size card. I covered the white base card with this backing paper from my stash the image was adhered to a light blue card coloured the image with copics I put her on a tilt to make her a bit more interesting Inside the card reads
"You don't look a day over whatever age your pretending to be" 
Now I am going to do some with the boy on it


cake on fire


As soon as I saw this set of stamps https://payhip empty pockets set I  had to have it as I know a few people who will get a card from me out of this set
The background has been embossed with the Happy Birthday folder, I then swiped the top, with Old Paper, distressed ink Then adhered to white base card The image is two stamps I printed out onto white card, coloured with copics, then distress inked around the edges and over the card randomly. The fire extinguisher I printed off the  net

Saturday, 19 September 2020

Dandelion


JJ the gardener image, looked on the net for a sentiment saw this one so printed them out. I coloured her with copics found a stamp in my collection and stamped them on with a distress ink, I then adhered her to backing paper, the colour worked, then onto white base card
Was a quick make for my daughter in law, as she decided to grow flowers on their lifestyle block to sell, but first she has to get rid of the dandelions
Am putting this in